第一步:准备软件:
请下载与系统相对应的软件包,
32位的系统选X86的软件包,64位的选择X64的软件包。
软件一、UPUPW
UPUPW Kangle版全能服务器绿色平台K1.9-32位云端下载:http://pan.baidu.com/s/1ntRvYPF
UPUPW Kangle版全能服务器绿色平台K1.9-64位云端下载:http://pan.baidu.com/s/1c1fRueO
软件二、easypanel
IIS 6.0 32位(x86) 64位(x64)
IIS 7.0/7.5 32位(x86) 64位(x64)
第二步、配置IIS插件
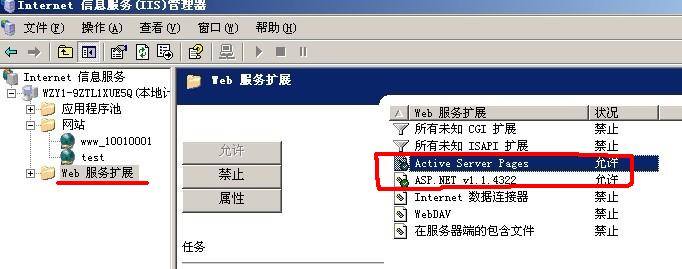
1.启用asp , asp.net打开iis管理器, 选中“web 服务扩展”,允许active server pages和asp.net两项,如图:
2. 关闭日志
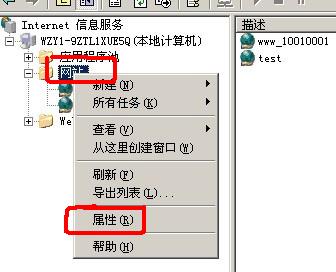
右键点击网站。“网站—>选择属性—>网站—> 关闭日志” 如图:
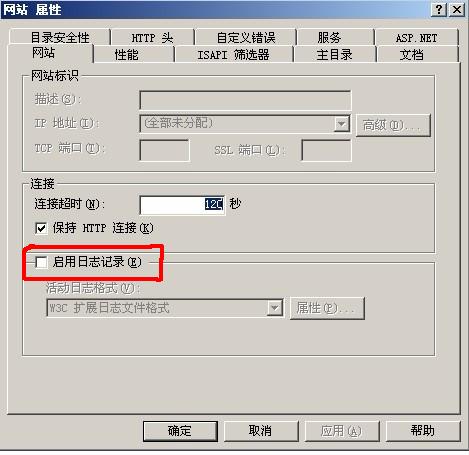
把“ 启用日志记录” 勾去掉。
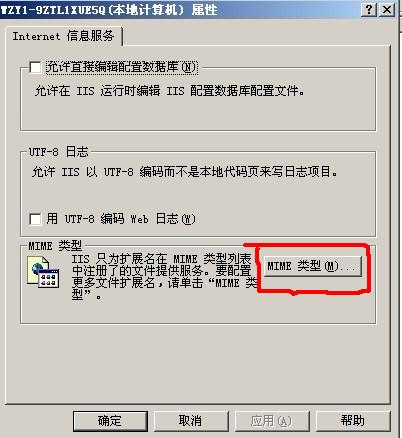
3. 增加默认mime类型为text/plain
在iis管理器点本地计算机。“本地计算机—>选择属性—>mime 类型—>新建—>扩展名”处输入: * mime类型处输入:text/plain
右键点击本地计算机
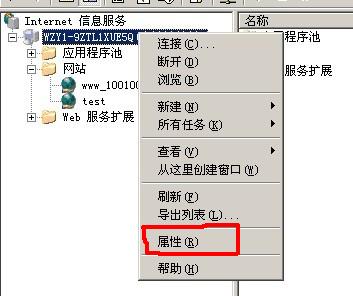
出现:
选择 MIME 类型
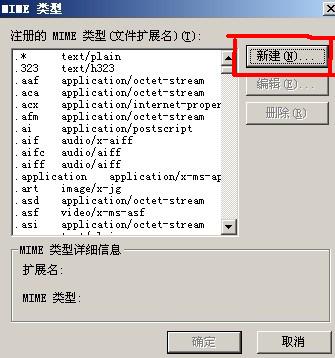
新建:
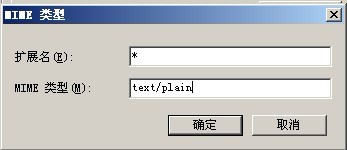
点击确定
4. 允许父目录包含
右键点击网站“网站—>选择属性—>主目录—>配置—>选项—>允许父目录包含”

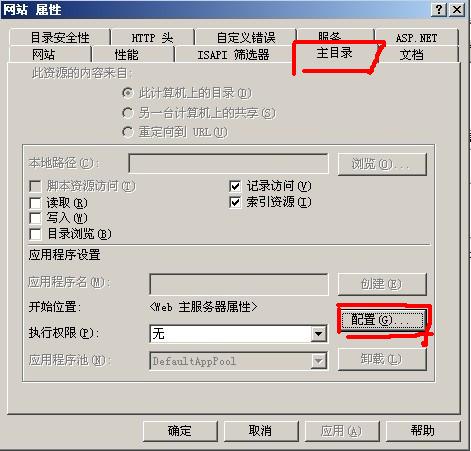
选择 配置
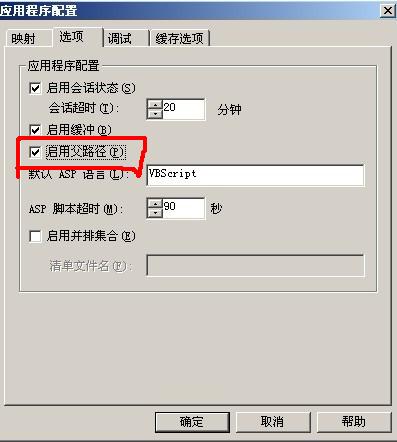
选择“选项->勾选启用父路径”, 点确定
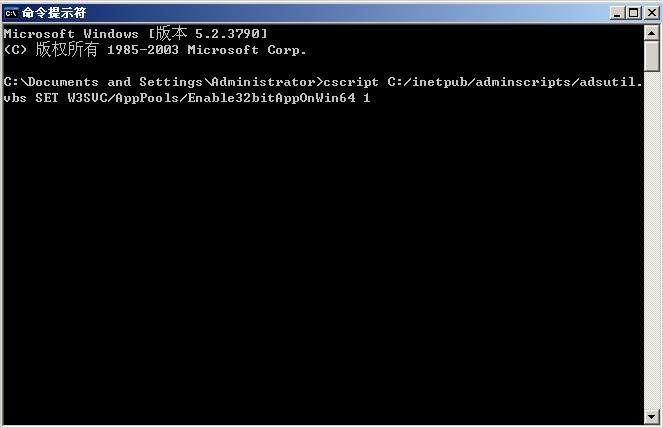
5.64位的IIS需要在cmd下运行一条命令(注:32位IIS可跳过,不需要运行):
cscript C:/inetpub/adminscripts/adsutil.vbs SET W3SVC/AppPools/Enable32bitAppOnWin64 1
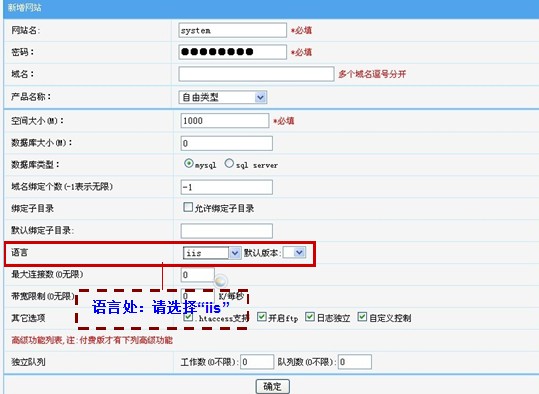
6.在easypanel或vhms中新建空间或产品时请选择iis模板,如图:、
注意事项:
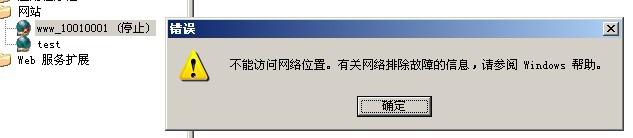
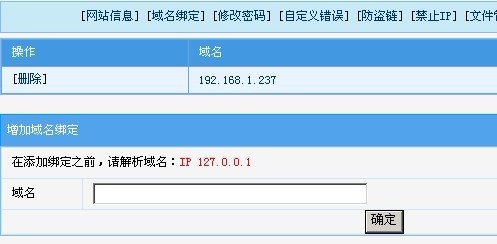
使用iis插件的asp空间在easypanel域名绑定处不能绑ip,只能绑域名。否则会出以下错,如图:
---
转载请注明本文标题和链接:《win下面使用UPUPW kangle版搭建全能空间(带EP面板)》
发表评论